Dry-Fit the Table Layers
Stack the baseboard, raceway, and center field without glue. Confirm fit and orientation before you commit.
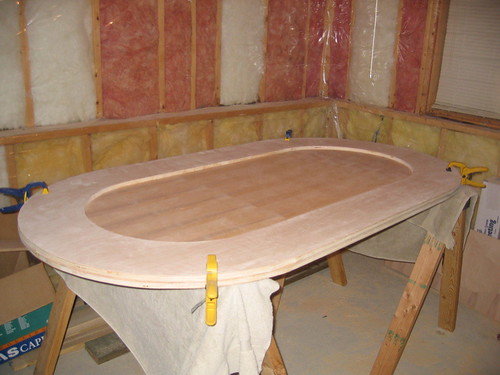
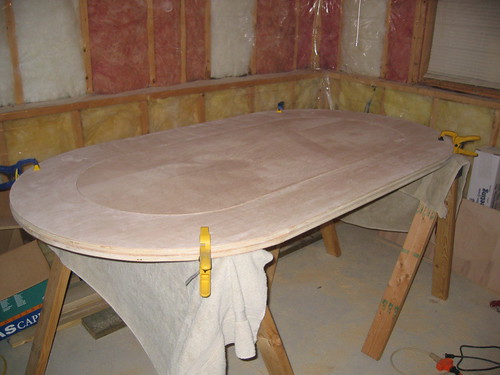
Table layout (top view)
Playing field, hardwood raceway, and 8 cup holders
What you’re doing in this step
Proving the woodwork before glue. You’re checking that the raceway sits cleanly on the base and that the center insert fits the opening the way you planned.
Set the raceway on the base
Place the raceway ring on the baseboard with the center insert out. Look for even overhang, flush joints where halves meet, and a clean pocket for the playing field.
Walk around the table. Sight the edges. If one side sits proud or a joint opens, adjust now—not after the glue is open.
Lay out the full stack
Confirm the full wood stack: baseboard, raceway ring, and center insert. The insert should drop into the raceway opening with a consistent fit.
Tip: Keep the center insert out of the raceway during the next glue-up so you don’t accidentally glue it into the ring. A dry fit with a few clamps (no glue) is cheap insurance—photograph a good dry fit so you remember orientation.
Useful for this step
Tools and supplies that match the work above. Full list on the materials and tools pages.
Bar / Quick-Grip Clamps (Set)
Borrow or buy as many as you can—ten clamps around an 8-foot oval is not overkill.
Carpenter Pencils (Pack)
Flat pencils stay put on plywood and mark clean compass arcs.
25 ft Tape Measure
For radii, 8" raceway inset, and cup-holder spacing around the oval.